
The live round of the Iso Dye Club has come to an end, although new students are still welcome to join and will be able to work through the ecourse at their own pace. It has been the most wonderful, inspiring whirlwind of an adventure. I feel so grateful to all the people who threw themselves into it with such enthusiasm and dedication, sharing their beautiful creations on Instagram and in our private group.
It has been such a good way to spend this quarantine/isolation time, hopefully for my students but also for me personally. I really appreciated staying busy, and feeling uplifted by everyone’s kind, supportive comments.
I’m also really glad that I offered it as ‘pay what you can’, to make it accessible to lots of people, especially at this time when so many of us are out of work or underemployed. Going forward, I want to bring this pricing model to more of my business, because it is a small way that I can help to create a more equitable world. Or as Charles Eisenstein puts it, The More Beautiful World Our Hearts Know Is Possible.
I want to share some of what we did in the course, because I really enjoyed creating simple lessons using materials that people would be able to access easily at home or in their neighbourhood, yet still get some stunning results. This craft doesn’t have to be complicated or precise. At it’s most basic, you just put leaves on paper or fabric, hold it together somehow and heat it up! And I encouraged everyone in the course to embrace the results they got, because sometimes in eco-printing, as in life, we don’t get what we expected and it can be very healing to learn to accept this.
Week 1: Rolled Bundles
For Week 1, we started with some simple rolled bundles, on both paper and fabric. We rolled around jars and cans – even rusty cans, if people were lucky enough to have these highly coveted, utterly magical eco-printing tools!
We used plain fabric and paper, to see how even the most simple technique could still give us some beautiful colours and patterns:

Week 2: Simple Homemade Mordants and Binders
In Week 2, we prepared our fabric and paper with homemade iron mordants and with protein binders (from kitchen scraps of yogurt, cow’s milk, nut milk or other protein-rich liquids). As well as leaves and flowers, I also demonstrated with some ingredients from the kitchen – onion skins, tea leaves and a sprinkling of turmeric – because some of the students were in isolation in apartments, or still emerging from the depths of winter. Here you can see the different colours and strength of results on plain cotton, and that prepared with a protein binder and iron mordant (from left to right).

Week 3: Folded Bundles
This week, we folded our paper and fabric and cooked them in dyebaths. On paper we experimented with creating different amounts of colour in the background. These bundles are both the same paper with the same leaves, cooked in the same dye bath, but I shared a simple trick for creating either dark or light backgrounds:

And on cotton, we created some shibori patterns around our leaf prints. This was one of my favourite lessons from the whole course. The leaves were eco-printed on fabric prepared with a simple yogurt binder, with a few tricks to get these vibrant results:

Week 4: Fun Things to do with Pale Results
When eco-printing, it is inevitable that some of your results will be pale or uninteresting. So we finished the course by exploring 3 ways to improve our pale prints. One option was to re-print the paper or fabric, with the addition of iron to bring out more colour and detail:

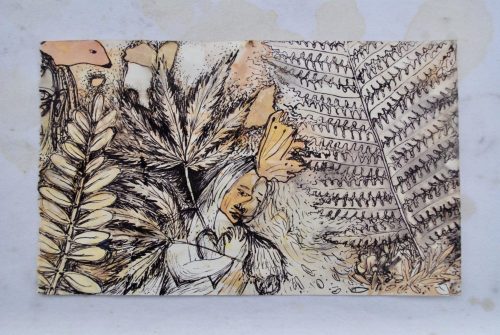
Another option was to draw over our paper eco-prints, either what we could see or what we could imagine. I shared some simple tips to encourage even the most reluctant artist to give it a try:
And we finished the course with a bonus lesson, because I wanted to thank everyone who was involved. So we used some of our pale fabric results to create some mini shibori moons:
This is another contender for my most favourite lesson. Sometimes the marks and leaf prints already on the fabric creates the most wonderful serendipitous results:

I hope you enjoyed this peek into the ecourse. If you are interested in joining us, I have left enrollments open because I want this course to be available to anyone who wants to be comforted or inspired by the magical combination of plants, creativity and community. Read more or join us here – the sliding scale starts at about the price of a coffee!
And whether you are enrolled in the course, or just enjoying this preview, I’d love to know which week or lesson is your favourite?!
Interested in your course.
Great, let me know if you have any questions about it Lesley.
Hi,Lesley, I would be really interested in doing an ecourse, sad to of missed that one, the results were amazing!!
Hi Jane, although the ‘live’ Iso Dye Club is finished, the ecourse is still open for enrolments and there are still new people joining us. So if you want to join us to, you can check it out here: https://learn.gumnutmagic.com/product/iso-dye-club/
Absolutely enthralled by these results. Is the course still available?
Hi Sandra, yes the course is still open to enrol in and new people are still joining us 😊🌿 You can check it out here: https://learn.gumnutmagic.com/product/iso-dye-club/
Amazing results
And these are only my results. The students got so many wonderful results too! You can check out some of their photos on our hashtag if you want
Je suis interressée par vos cours en ligne. Comment procédez-vous? Quel en est le prix?
Merci
Hello, you can view the prices and enroll here: https://learn.gumnutmagic.com/product/iso-dye-club/
would love to receive your posts on natural dyeing. thanks
Love it all. But week 4 is my favourite. I will enroll.
Thank you for making it so accessible.
Love the mix of nature and creativity!
Looking forward to hearing about new and exciting ideas
I would love to do this course. Please let me know how to enroll. Thank you
Thanks for your interest Alison, you can join the course here
Just saw your course on Pinterest and am interested. Is it possible to join now?
Thank you
Hi Faye, yes I have kept enrollments open for people who want to work through the course at their own pace. You can check it out here.
muy interesante la propuesta ua pregunta se puede imprimir sobre arcilla o solo papel,Gracias
I think it would be difficult to eco-print on clay, but it would be so exciting if someone figured out how to do it!
Came upon your website by chance today. Quietly thoughtful pieces … intend to explore further.
Lovely pieces. My favourite is week 4. I think I saw your course some time ago, but at that time I wasn’t able to commit to a weekly regime. I hope to be able to book into this class if it is still available.
Hello, yes this course is still open for enrolments. The ‘live’ course has finished, but all the lessons and videos are available for you to work through at your own pace. You can click here to check it out or enrol.
Thank you
Wonderful !is it still available ? Can I do the course? I am interested only in the dyeing methods for homemade paper.
Hello, yes the live round of the course has ended, but you can still sign up to access the lessons. Click here to take a look. I also have an eco printing on paper ebook on that website that you might be interested in.